

How To Set Default Check Register In Quickbooks
Yous tin tape debit card and ATM transactions the aforementioned style that yous record checks that you write.
How to write checks from the Write Checks window
You tin can record handwritten checks and other checks that you want to print with QuickBooks by describing the checks in the Write Checks window.To write a check from the Write Checks window, follow these steps:
ane. Choose Cyberbanking→Write Checks.
You can also click the Write Checks icon located in the Banking section of the home screen. QuickBooks displays the Write Checks window, equally shown.
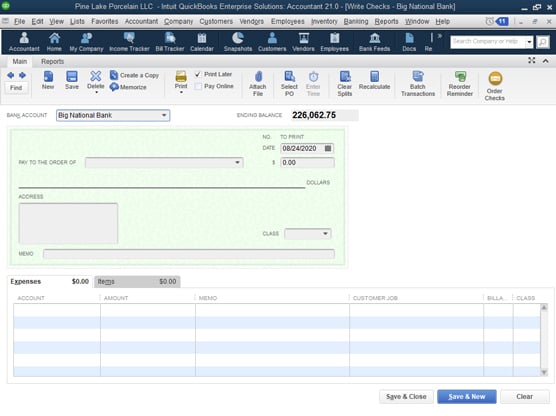 The Write Checks window
ii. Click the Banking concern Account drop-downwardly menu at the peak of the window, and choose the account from which you desire to write this bank check.
This footstep is really important and is something that you should always remember to do before you write a check if you accept multiple bank accounts.
3. Enter a check number or mark the check for printing.Select the Impress After check box if you plan on printing the check with QuickBooks, using your printer and preprinted bank check forms that you've purchased. If you lot're recording a cheque yous wrote by paw, enter the check number y'all used for the check in the No. text box.
iv. Fill in the check.If you lot've written a check to this person or party before, the AutoFill characteristic fills in the name of the payee in the Pay to the Order Of line for y'all later on you lot start typing the name. How QuickBooks manages this feat may seem akin to magic, only it's really not that tough. QuickBooks just compares what you've typed so far with names in your lists of customers, employees, and others. Equally presently as QuickBooks can match the messages that y'all've typed with a name in one of these lists, information technology grabs the name.
If y'all oasis't written a check to this person or party before, QuickBooks asks you to add the payee name. Do that.
Enter the amount of the check side by side to the dollar sign and then printing Tab. QuickBooks writes the amount for you on the Dollars line. Information technology also writes the address if it'south been filled out in the payee's primary file.
5. Fill in the Expenses and Items tabs, if necessary.6. Click the Salvage & Shut push or the Save & New button to finish writing the cheque.
There you have it. Your check is written and entered in the register, set to be printed and mailed.
How to write checks from the register
People who've grown accustomed to Quicken, a cousin of QuickBooks, may want to apply the annals window to write checks. (Quicken users like the register metaphor better, I guess.)To write a check from the register, follow these steps:
1. Open the register.
Choose Banking→Use Register or click the Register icon in the Banking area of the abode screen. If you take more than one bank account, QuickBooks displays the Apply Register dialog box then that you tin select the proper business relationship.
From the drop-downward menu, choose the checking account confronting which yous want to write the check and then click OK. You run into the register window (shown). The cursor is at the end of the register, set for you to enter cheque information. (QuickBooks automatically fills in today's engagement.)
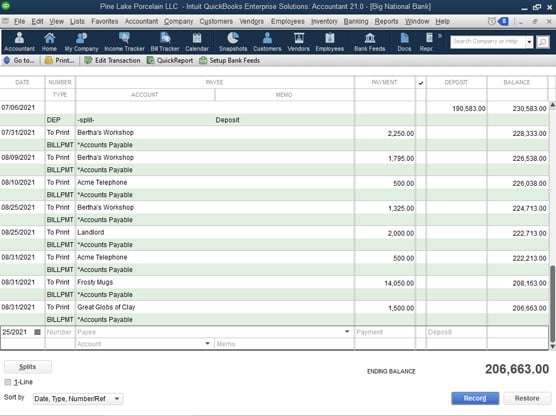 The annals window
QuickBooks uses the account name in the window title. This is why the effigy refers to Big National Depository financial institution. Large National is the proper noun of the fictitious bank account that I prepare.
2. Fill in the data for your cheque.Notice that the entries yous brand in this annals are the same ones that you'd brand in the Write Checks window. If you lot're more comfy inbound checks in that window, yous can click the Edit Transaction button, which is on the ribbon at the acme of the register window, to meet the Write Checks window in all its glory and write a bank check in that location. In fact, if y'all want to enter expenses or itemize what you're paying for with the check, y'all have to click the Edit Transaction button and get into the Write Checks window.
Otherwise, but get from field to field and enter the data in the register. Over again, utilise the drop-downward menus to enter the Payee and Account names. If you enter a Payee or Business relationship proper name that QuickBooks doesn't recognize, the program asks you to give more data.
Here'southward sort of a trick question: What if the check you're writing pays more than than one category of expense? Suppose that you pay your landlord for both your rent and a share of the utilities. Are you limited to one expense account? Do you face the mother of all accounting dilemmas: choosing between 2 right accounts? Well, no, you don't. You can just click the Splits push button. QuickBooks displays a splits area that you can utilise to split a cheque across several accounts. A $ane,500 check that pays $1,200 of rent and $300 of utilities, for example, can split onto two separate lines: one that records the $ane,200 of rent expense and one that records the $300 of utilities expense.
iii. When you cease filling in the check data, click the Record push button.You lot can too click the Restore button if you decide that you lot desire to become back to outset over again. Clicking Restore blanks out what y'all just entered.
If you write checks by paw, as opposed to printing them with QuickBooks, make certain that the check numbers in the register and the cheque numbers in your checkbook friction match. You may need to get into the QuickBooks annals and change numbers in the Number column. When your depository financial institution statement comes, reconciling your banking company statement and your checkbook is much easier if you enter check numbers correctly.
How to change a check that you've written
What if you need to change a check after you've already entered information technology? Perhaps you made a terrible mistake, such as recording a $52.50 check as $25.20. Tin can you gear up it? Sure. But get into the annals and find the bank check that you want to change. Go to the Payment or Deposit field, and brand the change.If you have more extensive changes to make (if the bank check is a split transaction, for example), put the cursor where the check is, and click Edit Transaction. QuickBooks displays the Write Checks window with the original check in it. Brand the changes. (Don't forget to make changes on the Items and Expenses tabs too, if necessary.)
When you finish, click Salve & Close. You go back to the register, where you see the changes in the check.
If you take the Write Checks window displayed, you can also employ the Adjacent and Previous buttons to page through your checks and brand any changes.
Pack more checks into the register
Ordinarily, QuickBooks displays ii rows of information nigh each cheque yous enter. It also displays two rows of data near each type of transaction that you enter. If you want to pack more checks into a visible portion of the register, select the one-Line bank check box at the lesser of the register window. When you lot select this check box, QuickBooks uses a unmarried-line format to brandish all the information in the annals except the Memo field. 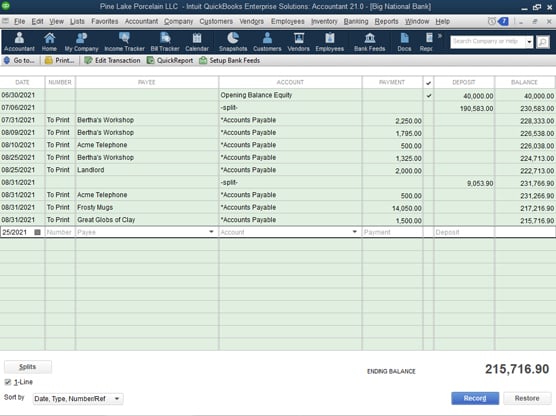 The register window in 1-Line display
Compare the preceding two figures to encounter what the 1-Line display looks like. Registers tin get clumsily long, and the 1-Line display is helpful when you're looking through a long annals for a bank check or transaction.

How To Set Default Check Register In Quickbooks,
Source: https://www.dummies.com/article/technology/software/money-management-software/quickbooks/how-to-write-checks-from-quickbooks-2021-275382/
Posted by: shipmanthermser.blogspot.com
0 Response to "How To Set Default Check Register In Quickbooks"
Post a Comment